
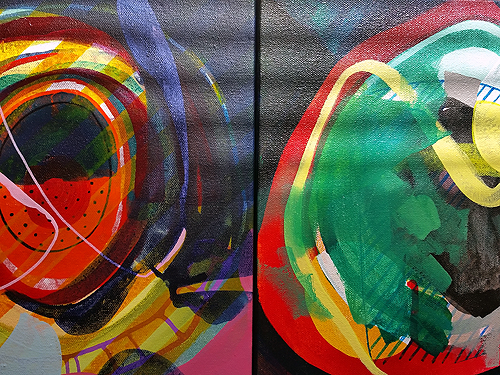
Amanuensis, acrylic on canvas, 10 x 10 inches, 2015 by Sarah Atlee
Amanuensis. Acrylic on canvas, 10 x 10 inches, 2015 by Sarah Atlee Sometimes I can't sleep.
Sometimes my mind wakes up before my body is ready and I have to try to convince it to settle down and go back to sleep. My mind, rebellious, goes to the Bad Thoughts. I think of every time I've ever been angry, hurt, or humiliated. I rehash the memories in detail, resulting in more feelings of anger, hurt, and humiliation, and so on until the birds chirp nyah nyah na-nyah nyah and I give in and go make coffee.
This pattern of thinking is sometimes called rumination. The mind goes round and round, thinking that if it just thinks hard enough, it can stop thinking about a thing. Of course, it doesn't work like that.
Practicing mindfulness is a great way to break this destructive pattern. In The Mindful Way through Depression, the authors remind us that "There is an alternative strategy for handling the negative moods, memories, and thinking patterns in the present moment, as they arise. ... It is called awareness." (If you'd like to learn more, I highly recommend this book.)
Mindfulness and meditation are things you practice, however, meaning that no one does them perfectly right out of the gate. I've found a tool that helps me through these wakeful Bad Thought times.
Space Hotel
I first heard Al Gromer Khan's album Space Hotel years ago, by accident at a friend's house. It's been a consistent favorite of mine for over 15 years. It's the perfect blend of soothing, mysterious, colorful, and calm. Listening to these beautiful sounds provides my mind with a focal point, someplace to return while letting the Bad Thoughts pass away like clouds. A sample:
Khan gave me Amanuensis.
The image you see above floated into my consciousness while meditating on Space Hotel. I saw this spongy white rectangle, like a tofu cake, with yellow arcs passing through it. Layered, repeating passages put me in mind of a cosmic game of telephone, hence the title Amanuensis - one who copies.
Learn more about Al Gromer Khan at New Earth Records, Khan's website, and his Facebook page.
Zoe Keating
I recently learned of experimental cellist Zoe Keating's solo career. I didn't realize I'd been listening to her play with Rasputina for many years. Her album Into The Trees has become another touchstone of Good Sounds to battle the Bad Thoughts. Listen for yourself:
Honestly, does it get any better than this? Explore Zoe Keating's music on her website and Facebook page.
Here's a look at these seed-bean-things a week ago:
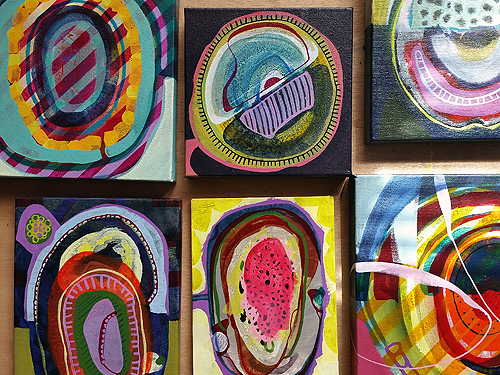 Various works in progress, acrylic on canvas, 2015 by Sarah Atlee.
Since then, I've polished off three.
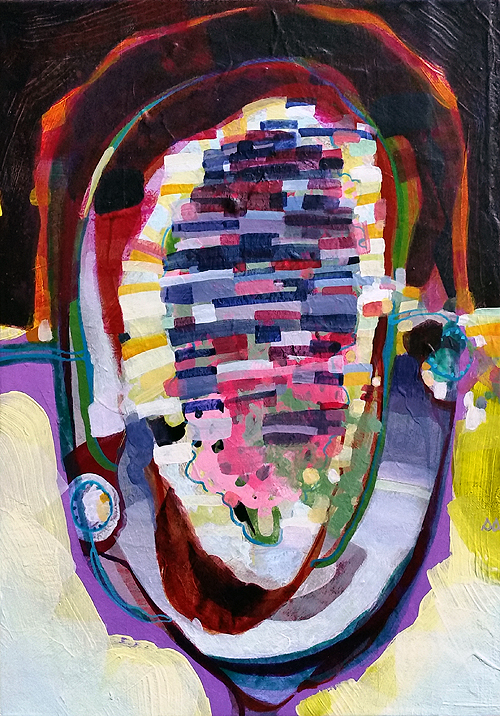
 Reflected Root. Acrylic on canvas, 12 x 8 inches, 2015 by Sarah Atlee.
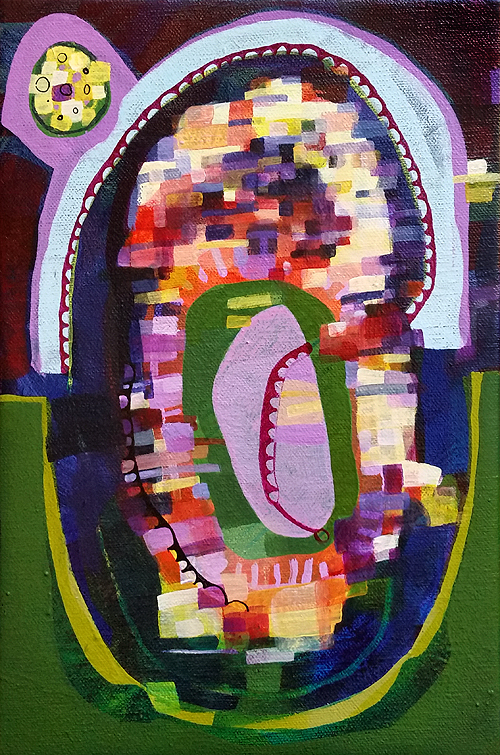
 Rigor Samsa.* Acrylic on canvas, 8 x 8 inches, 2015 by Sarah Atlee.
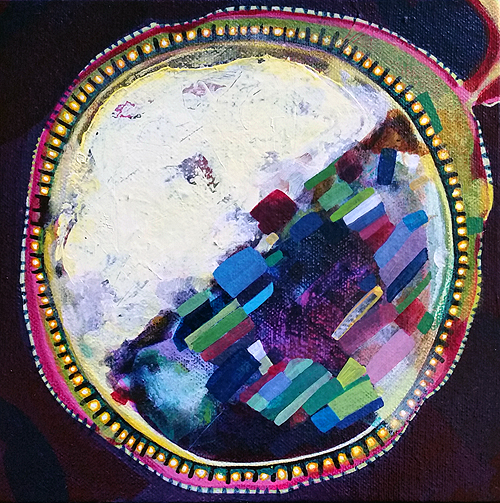
 Heavy Bean. Acrylic on MDF, 10 x 7 inches, 2015 by Sarah Atlee.
* Rigor Samsa is a term borrowed from The Dictionary of Obscure Sorrows:
n. a kind of psychological exoskeleton that can protect you from pain and contain your anxieties, but always ends up cracking under pressure or hollowed out by time—and will keep growing back again and again, until you develop a more sophisticated emotional structure, held up by a strong and flexible spine, built less like a fortress than a cluster of treehouses.
Some elements remain, others are covered or scraped away. Such is the evolution of a painting.

Seeds, maybe? We'll see.
 I work almost exclusively in acrylic on canvas. For larger works I use unstretched canvas hanging it over a dowel rod, much the same way you would display a quilt or tapestry.
But for my smaller works I use Blick Gallery Profile pre-stretched canvases.
Side note: Everyone who's been through art school has learned to build their own stretched canvases. I used to. Now it's more economical for me in terms of time and labor to order pre-made canvases in batches of 4-8. Want to learn to build canvases yourself? YouTube's got you covered.

Why Bother?
When someone buys my painting and takes it home, I want them to know that they have purchased a quality product that will last for decades to come - not something shabby that will fall apart in a year. The value of my work is more than the paint I've put on the canvas; it's in the care I've taken to ensure that my collectors enjoy living with my art. Prepping a canvas before painting is just one way to demonstrate that I care about my client's experience.
The preparatory process also prevents small problems that, added up, can really interfere with the final product.
Step 1: Corners

I buy these Blick canvases because they are very well-constructed. However, the corners do tend to come loose, and sometimes the canvas has been trimmed unevenly. (Not true of hand-built canvases; see note above re: economy.)
See those flappy edges? Even if I paint over them those are still weak spots that will get worse as the painting ages. I want to nip that in the bud.
I glue down those corners with Golden Heavy Gel.
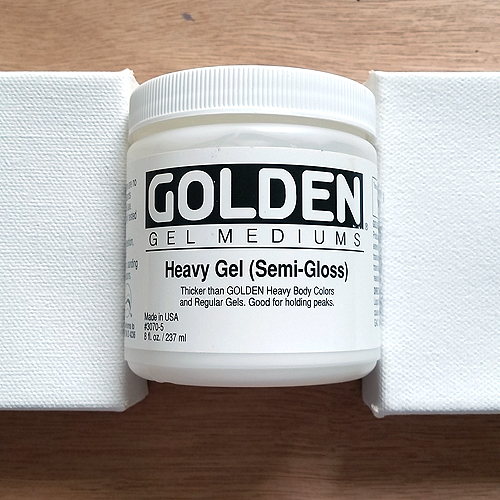
I apply the gel undiluted to the corners of the canvas, both on the sides and the back, and press those flaps down hard. Any gel that squishes out gets smeared over the raw edges to seal them. It doesn't matter how much gel ends up being visible because I'm going to paint over the entire thing. I let them dry about 30 minutes.

Step 2: Sizing the Back
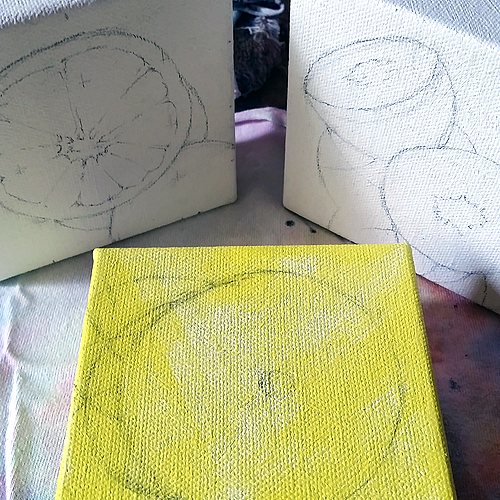
The canvases you see pictured here are very small - 4x4" each. This next step is much more important for larger canvases.
In most cases, a pre-stretched canvas will be primed on the front side only. Priming the other side strengthens the canvas and helps ensure its longevity. Also, the tighter your stretched canvas, the less likely you are to bump against the underlying stretchers while painting.
With a stiff brush, I wet down the back of the canvas. I make sure to get that water as far under the stretchers as possible. On a larger canvas, I follow up with diluted gesso. I brush both vertically and horizontally to work the water and gesso into the weave of the canvas. You'll notice right away that the canvas gets tighter. It will loosen a little after drying, but will be stronger for the additional gesso.
Step 3: Gesso Coat
I buy canvases pre-primed, but I like to add an additional thin coat of gesso to front and back before painting. The manufacturer's acrylic primer can sometimes resist initial paint application, causing the paint to bead up on the surface. Gesso is chalkier and will soak that first coat of paint right up.

Or maybe a super-fun and interesting thicker coat.

A little sanding may be in order on your stretchers. Nobody likes splinters, right?
Step 4: Rock Out
Now she's ready to go.
The Finished Product
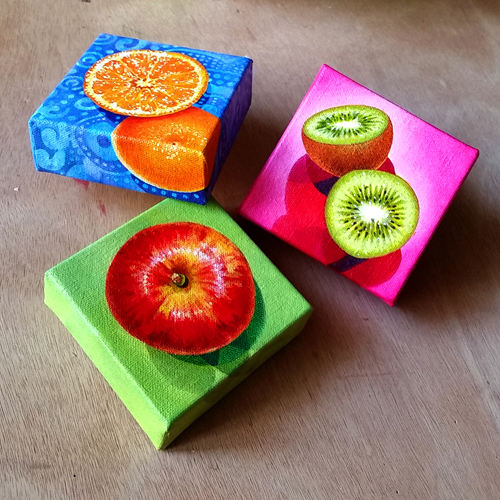
Orange, Kiwi and Apple. Acrylic on canvas, 4x4" each, 2014 by Sarah Atlee Private commission
What are your tips for prepping before painting?
Let us know in the comments below.